Tuesday, September 25, 2012

Canning tomatoes

Tomatoes are my favorite fruit to grow and  I will admit that they get a bit more TLC in the garden than some of the other plants.  I love to grow many different varieties and have found that certain types of tomatoes are better for the conditions in my region.  Mountain Princess tomatoes are well suited to my short growing season and cooler climate as are Russian varieties like Cosmonaut Volkov and Moskvich.  That being said, I still can't help myself from growing some heirloom Brandywine tomatoes.  They are much better suited for a longer growing season and a warmer climate, but even if I can't get the same yields that I would get if my climate were optimal, I think they are just so big, beautiful, and delicious that I will accept a lower yield.  I recommend experimenting with different types of tomatoes in your own garden to see what tends to work best for your unique climate and growing conditions.

This year's tomato crop

Indigo Rose tomatoes
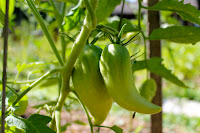
San Marzano tomatoes


ripe San Marzano


There are three options when preserving tomatoes:  they can be frozen on a cookie sheet, skin and all, then placed in freezer-safe bags; they can be sliced and dehydrated; or they can be canned.  Freezing and dehydrating are probably the easier methods but, in my opinion, nothing beats canning them.  I think it's probably because that's how my family did it when I was growing up, but I also happen to think they taste best that way.  I pull them out of the pantry in the winter months to make jambalaya, chili, pasta sauce, or a creamy tomato bisque. 


Start by turning on your favorite music and assembling your supplies.  You will need:

Tomatoes- washed with blemishes and stems removed.  For this batch I used a mix of San Marzano, Brandywine, Mountain Princess, Cosmonaut Volkov, and Indigo Rose tomatoes from our garden.


Glass canning jars- either pints or quarts, washed and inspected for nicks or cracks


Canning lids- must use new ones every time you can a batch
Canning bands- these can be used over and over again
Giant pot- large enough to submerge 6 or 8 of the jars in boiling water at a time.  If the pot has a lid it will help get the water boiling more quickly.


Big pot- for blanching the tomatoes
Medium pot- I like a shallow one so that the lids aren't as likely to stick together


Big bowl- for the peeled, quartered tomatoes
Basin of ice cold water- I fill up the sink with cold water and add two trays of ice cubes
Clean cloth- for wiping the rims of each jar clean after filling them

Fill your giant pot with water and bring to a boil.  Our giant pot came with a handy jar caddy that holds 8 quart-sized jars and makes removing the jars from the boiling water a bit easier.   We bought the set for $30 at our local farm supply store several years ago.  Once the water is at a rolling boil, add the jars and boil them, covered, for 10 minutes to sterilize them.  Don't begin your 10-minute count until the water has returned to a boil.  In your medium pot, heat water on low and keep warm.  Place your lids in a single layer and keep them in the warm water until you are ready to place them on your filled jars. 

Meanwhile, fill your big pot with water and bring to a rolling boil.  Drop the tomatoes into the boiling water in small, uncrowded batches until the skins crack either on their own, or when gently prodded with the end of your slotted spoon (about a minute).  Remove the tomatoes and drop into the cold water.  Allow to cool.  Peel the skins from the tomatoes.  Using a paring knife, remove the core of each tomato and then quarter each tomato into the big bowl.  My chickens love to eat the skins and cores when I am done and I love that nothing is wasted.

Once the jars are sterilized and all tomatoes have been blanched, peeled, cored, and quartered they are ready to be canned.  Fill each jar, pressing down gently to remove any air bubbles, until there is about a 1/2 to 1/4 inch head space from the rim.  It is important to leave this bit of space.  Add a teaspoon of salt to each jar and spoon one tablespoon of the tomato juice from the big bowl into each jar.  Be very careful to wipe each rim clean with your cloth.  Carefully remove each of your lids from your medium pot of warm water and place them on each jar once the rim has been cleaned.  Add a band and twist gently until it just barely tightens.

While you are prepping your tomatoes and filling your jars, bring the water in the giant pot back to a rolling boil.  Once the lids and bands are in place, put the jars in the jar caddy (if using) or simply submerge each jar into boiling water.  Start your 10 minute timer when the water returns to a boil.  Once 10 minutes have lapsed, remove each jar carefully and place on the counter to cool.  As they cool you should begin to hear each one POP as the seals adhere.  Don't be disappointed if they don't all pop.  Sometimes the seal will adhere without a dramatic pop and you can check this by pressing the center of each lid.  If the center of the lid doesn't move at all, it is sealed.  If it pops back up as you let go, it did not seal.  Even then, don't despair.  Just place that jar in the fridge and make sure to use it first.  It will stay good in the fridge for several weeks. 

Once the jars have cooled, tighten each band down and label your tomatoes.  Place in the pantry and enjoy throughout the year.


Monday, September 17, 2012

Preservation Mondays

Mondays at my house this time of year have been dubbed "Preservation Mondays".  I have the day off from work and a garden full of vegetables begging to be preserved.  I crank the music up high, select a few things from the garden and get to work canning, freezing, dehydrating, or otherwise preserving the harvest for colder days when the garden is just a memory.  Today as I was preparing to make a butternut squash soup and a pumpkin puree to freeze, that proverb came to me about giving a man a fish and having him eat for a day or teaching a man to fish and having him eat for a lifetime.  I say give a man a can of food, let him eat for a day.  Teach a man to can food, let him eat for a lifetime.   And voila, a blog was born.  With this blog I aim to get people excited about food again.  I hope to inspire people by sharing my experiences, tips, recipes, and photos.  I hope to remind people why healthy food is so important.  I hope to inspire people to grow a little food of their own, or to buy food from a local farmer in their area. 

In an era where time is limited and food must be quick, cheap, and easy, it is difficult to get people excited about growing and preserving their own food.  If people could experience the feeling I get from pulling a frozen pumpkin puree out of the freezer on the eve of Thanksgiving and serving a pie from my own garden as part of my Thanksgiving feast, I think they might be inclined to give it a try.  I also think folks may be intrigued to grow and preserve their own food if they knew how much money it could save them at the grocery store.  Sure, there are upfront costs involved- we spent about $150 dollars this season on garden supplies (seeds, a few veggie starts, bales of mulching straw, a bag of compost or two when we ran out of our own, etc.) and we had to make one-time purchases over the last few years including a chest freezer, canning equipment, and a dehydrator, but those have already paid for themselves in the many pounds of produce that they have allowed us to grow, preserve, and store.  I am also intrigued by the idea of carrying on a dying tradition.  The time has long since past when home economics classes in school taught these skills to students and, unless we are so lucky as to have a parent or grandparent who practice home food preservation techniques, this skill is all but lost with our generation. 

I get a thrill from being able to eat healthy food that I have grown with my own hands.  If I can't grow it myself, I love being able to buy it from farmers in my area who I get to know by name.  I know that I am extremely lucky in this department, since I live in an area where so many small farms and food producers thrive.  There is something really intangible and special about knowing how, where, and by whom my food is grown.  Its nice to know that it hasn't traveled 1,500 miles to reach my plate like the average fruit or vegetable in a conventional grocery store.  Plus, eating this way has many ancillary benefits:  it supports local farmers in my area, preserves the beautiful agrarian landscape, supports the local economy, and creates a strong sense of community.
 
So, back to the agenda for today:  A prelude to a Thanksgiving pie and a Butternut Apple soup for the freezer.  

The pumpkin puree begins with one whole sugar pie pumpkin, split in half, seeded (set seeds aside for roasting a quick, tasty snack), and with the remaining loose pulp scooped out and composted.  Then lightly brush the cut sides with olive oil and lay them, cut side down, on a baking sheet.  I heated the oven to 400 and roasted them until the skins began to turn golden brown and the pumpkin was soft to the touch- about 45 minutes.  Allow the pumpkin to cool, peel and compost the skins, and put the rest in a blender.  Puree until smooth.  Then pour into freezer safe containers and pop in the freezer.  If you can't wait until thanksgiving or you have multiple pumpkins to put up, you can also make a delicious pumpkin soup much like the butternut soup below, or you can toss the pumpkin puree with penne pasta, spread it into a casserole dish, top with your favorite cheese and bake for a really great casserole.


To make the roasted pumpkin seeds:

Wash and pat the seeds dry, then toss them in a bowl with olive oil, salt, pepper, and a bit of chili powder for a spicy kick.  Spread them out in a single layer on a baking sheet and toast until crispy and golden brown.  Enjoy right away, as these don't stay crunchy more than a day or so and they aren't nearly as tasty when they get soft.


For the Butternut Apple soup:

Halve one large butternut squash and scoop out the seeds and pulp for the compost bin.  Lightly brush the cut sides with olive oil and sprinkle with salt and pepper.  Place cut side down on a baking sheet and bake at 400 for 45 minutes, or until the skins are golden and the squash is soft to the touch.  Allow to cool and then peel away the skins.  Puree the squash in a blender or food processor.  While the squash is baking, peel and chop one large white onion (I used one from the garden), one large apple (I used a Honeycrisp apple from Champlain Orchards), and a few cloves of our garden garlic.  If you like, you can brown a few strips of bacon in your soup pot, remove and crumble the bacon and set it aside to add back in later.  Otherwise, warm a few tablespoons of olive or sunflower oil in your soup pot and add the onions, apple, and garlic.  If you have fresh rosemary and thyme, add a bit of each.  Saute until the onion and apple soften, then add the butternut puree and enough chicken stock to get the desired consistency.  Add salt and pepper to taste.    Simmer over medium-low heat for 10 minutes.  Remove from heat.  Use an emulsion blender or puree in batches in the blender until smooth.  Return to the pot and add a tiny splash of balsamic vinegar or sherry vinegar and remove from the stove.  Add back the crumbled bacon (if using), pour into freezer-safe containers and freeze.  If you are eating it right away, or when reheating later, you can add a bit of milk or cream to give it a creamier texture.