Tuesday, March 19, 2013

Feast of St. Patrick & a birthday cake

Celebration was the theme at our house this past weekend.  I celebrated a birthday on Saturday and baked my favorite cake to commemorate- a buttermilk cake with lemon cream cheese frosting and blueberries.   Then on Sunday, because I enjoy celebrating food traditions, I prepared a traditional St. Patrick's Day feast.  Today I will share with you the recipes for both.

St. Patrick is the patron saint of Ireland and the holiday originally known as the Feast of St. Patrick was first celebrated by the Irish in Europe in the 9th century.  In the early 1600s, it became recognized as a holy day of obligation for Roman Catholics in Ireland and in 1903, it became an official public holiday in Ireland.  St. Patrick's Day falls during the Christian season of Lent and Irish families would traditionally attend church in the morning and celebrate in the afternoon. Lenten prohibitions against the consumption of meat and alcohol were waived and people would dance, drink and feast.  The traditional meal was Irish bacon and cabbage, but around the turn of the century, Irish immigrants living in New York City's Lower East Side substituted corned beef as a less expensive and more widely available option.  Thus, the American celebration of St. Patrick's Day typically consists of corned beef, cabbage, potatoes, and, of course, a pint or two of Guiness. 

I chose to make our Feast of St. Patrick in a pressure cooker that my Uncle Tom sent to me.  The pressure cooker is great for making one-pot meals, cooks dried beans in a snap (even without pre-soaking!), and doubles as an excellent rice cooker.  It is similar to a crock pot, except that instead of slow cooking foods, it cooks them quite rapidly to juicy, tender perfection.  I get a lot of use out of mine.  The handbook that came with my pressure cooker included a recipe for corned beef & cabbage, which I used as my framework for this meal.  No pressure cooker?  No problem.  You can make this same meal in a dutch oven or in a crock pot.  You will just need to adjust the cooking times accordingly.

Corned Beef & Cabbage with Potatoes & Carrots:

3 lbs Corned Beef Brisket
12 oz Guiness
1 med onion, halved
1 shallot, halved
3 whole cloves garlic
2 cups of water or beef stock
4 medium red potatoes, halved
1 large head of cabbage, cut into 8 wedges
1 cup carrots, peeled and halved
Whole grain Dijon mustard

Trim any excess fat from the corned beef and if the seasoning packet is separate, open it and rub the brisket with the seasonings.  The brisket I selected comes from Lou's Garrett Valley Naturals and came pre-seasoned in a brine made of water, sea salt, unrefined sugar, beet powder, garlic powder, bay leaves, mustard seed, and allspice.   Place the brisket in the pot, then add the beer, onion, shallot, garlic, and the water or stock.  Then, lock the pressure cooker lid, select the meat setting, and cook for 60 minutes.  Release the pressure, open the cooker, and add the potatoes, carrots, and cabbage.  The carrots I used came from Elmer Farm in East Middlebury, VT and the cabbage is from Blackwell Roots in Cabot, VT.  Re-lock the lid, select the vegetable function, and cook 10 minutes.  Serve with a bit of Dijon mustard for the meat.


And now, for the birthday cake!  I chose this cake because it is my absolute favorite.  The buttermilk cake is super moist and the tart lemon cream cheese frosting tastes so great with some of our blueberries that we grew and froze last summer.  In addition to using our own blueberries, I also used our eggs, cream cheese from Green Mountain Farms, buttermilk from Animal Farm and flour from Nitty Gritty Grain Co.   This cake is really easy to make and can be paired with lots of other fruit toppings depending on what's in season or stocked in your freezer.

Buttermilk Cake:

1 cup sugar
1/2 cup unsalted butter, softened
2 eggs, beaten
2 tsp vanilla extract
3/4 cup buttermilk
1 1/2 cup cake flour
1/2 tsp salt
1 3/4 tsp baking powder

Preheat oven to 350 Fahrenheit.  If using frozen fruit, remove it from the freezer and set aside to defrost.  Grease and flour a 9 inch round cake pan, unless you are using a silicone pan.  In a mixer with a paddle attachment, mix the softened butter and sugar until they are creamy.  Add the eggs, then the vanilla, then the buttermilk.  Stop the mixer and scrape the sides.  In a separate bowl, combine the flour, salt, and baking powder.  If you don't have cake flour, you can use all-purpose flour and substitute 2 Tbsp of it for 2 Tbsp of cornstarch.  Sift the flour mixture once or twice.  Turn the mixer on medium and add the flour mix in several batches until combined.  Pour the batter into your cake pan and bake 30 minutes or until a toothpick inserted in the center comes out clean.  Transfer the cake to a rack and allow it to cool before frosting.

Lemon Cream Cheese Frosting

8 oz cream cheese, softened
1/4 cup unsalted butter, softened
2 Tbsp lemon juice
2 tsp lemon zest
1 tsp vanilla
1 1/2 cups confectioners sugar

Mix all but the sugar in a mixer with the paddle attachment.  Blend well.  Sift the confectioners sugar and then add to the mixer in two batches.  Blend until smooth.  Spread over the cooled cake.

To prepare the blueberries, I defrosted them, then squeezed a little lemon juice on them and sprinkled them with a little bit of sugar.  Stir, then put a spoon full on top of each piece of cake as you serve it. 


Tuesday, March 5, 2013

What is a Co-op, anyway?

If you read my posts regularly, you may have noticed a few mentions of my local co-op.  And, if you're curious like I was when I first heard mention of a co-op, you may be wondering what exactly it means to be a part of one.  The United Nations named 2012 the year of the co-op and the latest issue of Yes! Magazine features a cover story about how cooperatives are driving the new economy.  Publications like the Business Insider and Triple Pundit also feature articles on cooperatives.  So what exactly are they and why are they so important?

Here is what I know of co-ops so far:  They can be small like the Middlebury Natural Foods Co-op where I work and shop.   Or they can be Fortune 500 companies, like Land O Lakes and Sunkist.  They can be credit unions, art galleries, insurance agencies, even sports teams (did you know that the Green Bay Packers are a co-op?!).  All together the 30,000 cooperatives in the United States make up a $500 billion dollar industry, employ more than 2 million people, and have around 130 million members.  More Americans have membership in a co-op than hold shares in the stock market.  Globally, there are a billion co-op members with more than $2 trillion in revenue.  If these enterprises were a nation, their economy would be the ninth largest on earth.   What they all have in common is the fundamental idea that co-ops, just like people, can get more done together than anyone can do alone.

Here are a handful of other things that all co-ops have in common:  they are owned by their members in equal shares; their ownership is democratic, meaning that the members elect a board of directors to shape the priorities and direction of the co-op and the members vote on issues pertinent to achieving those priorities; they build healthy local economies; and they exist to meet the needs of their members.  Yes! magazine cites some fascinating statistics from a study titled Healthy Foods, Healthy Communities which point out that for every $1000 spent at a local food co-op, $1606 in economic activity is generated in their local food economy.  That means that 17% more money stays in the community than if that same $1000 was spent at a conventional grocery store.  There are also more jobs created for every million in sales with food co-ops adding jobs at a rate of 9.3% per million and conventional grocers at 5.8%.  Food co-ops on average source 20% of their products from local vendors compared with 6% for conventional grocers.  This means more money going directly to small, local family farms who are then able to stay afloat in the sea of Big Ag and continue to nourish their communities.

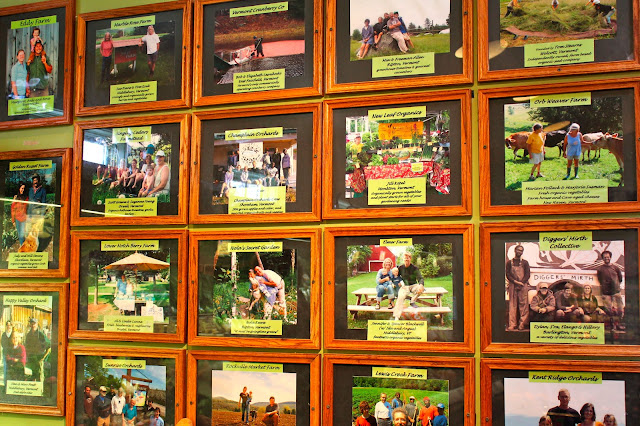
The local farmers who supply food to the MNFC are featured in photos in the produce, cheese & dairy departments.

http://upload.wikimedia.org/wikipedia/commons/7/76/ToadLane2009.jpg
Original building of the Rochedale Society of Equitable Pioneers
The cooperative business model is not new.  The first modern, consumer-owned co-op began in the 1840's when a group of cotton and wool workers in the depressed industrial town of Rochdale, England, decided that they were tired of being cheated by dishonest shopkeepers who would use rigged scales to sell flour mixed with plaster, used tea leaves that were dried and passed off as new, and rancid butter disguised under a thin layer of fresh butter.  They banded together to form the Rochdale Society of Equitable Pioneers and sold quality foods at fair prices with any profits distributed back to the members based on their use of the store.  This is where cooperatives really stand out among their big-business peers:  they are profit-making, but not profit-driven.  They are driven, instead, by a desire to meet the needs of their members and the needs of their communities first and foremost.  And not just in the sense of economic health, but also in the areas of education and civic engagement.


The Middlebury Natural Foods Co-op was founded in the early 1970's by a group of families who wanted access to healthy, natural foods at reasonable prices.  They operated first as a buying club, purchasing items at wholesale price and in bulk scale, then meeting at a different members home each time to split up the order among the group.  The buying club grew, and began having surpluses after dividing the items.  They also needed more space for storage and packaging, so they purchased a small store front in the Middlebury train depot and scheduled volunteers to run the store.  The store continued to grow with pre-ordering and retail store functioning side-by-side, and eventually elected a board of directors in 1976.  Fast forward to 2013, and the store is now in a beautiful new building with 3600 members and 60 employees.  The focus remains on providing healthy, natural foods to members of the community (based on a voted-upon buying criteria); stimulating a vibrant local economy; operating under democratic, cooperative ownership; and operating with environmentally sustainable and energy efficient practices.


Additionally, the MNFC puts strong emphasis on community education by sponsoring classes on budget shopping, food preservation, cooking basics, and other topics in partnership with the Hannaford Career Center.  Last week, we co-hosted a GMO labeling forum with the Northeast Organic Farming Association at the local American Legion. We often give tours to middle and high school groups, senior groups, and  college students who are studying local food systems.  In a few weeks, I will give a tour to a group of young parents who are interested in learning how to shop for healthy foods on a tight budget.  I'm particularly enthusiastic about that upcoming tour because I love debunking the myth that shopping for healthy, whole foods needs to be expensive.  I also like to let community members know that you don't have to be a member of the co-op to shop there, but membership does come with a discount at the store and at other local business in town.  Plus, membership brings monthly member coupons, an informative and educational monthly member newsletter, and the opportunity to vote and have a voice on issues that matter to me as a co-op member.  Board meetings are open to all members and members are encouraged to attend and participate. 


Another thing I find really interesting and appealing about my co-op is their strong emphasis on local products.  Many of the small farmers and food producers still deliver their goods themselves, and it gives members and customers a chance to meet them and ask about their products, processes, challenges, and experiences as a small food producer.  There is something special about meeting the people who grow and make your food, and you begin to feel a distinct connection between their success as a farmer/producer and your role as a consumer.  You begin rooting for them to succeed because you see how hard they work and you like what they bring to your dinner table.

I also love the fact that my co-op donated over 7000 pounds of food to our local food shelf last year, we compost much of the food waste that can't be donated to the food shelf, and many of our farmers and producers reuse the cardboard boxes and other containers they ship and package food in.  Things like maple syrup buckets, honey buckets, nut butter buckets, egg cartons, and glass milk containers are reused over and over again.  Food co-ops in general recycle 81% of their plastics, compared with only 29% at conventional food stores.  Reusing and recycling means a lot less food and materials are going to waste.


Vermont Cheeses

The MNFC represents just one example of a co-op and how it can impact a community.  You may not have a food co-op in your area, but you may have a credit union, an artists cooperative, a farmers cooperative, or an insurance co-op.  You may also have the opportunity to purchase items from cooperatives at conventional stores.  Cabot Cheese, Florida's Natural Orange Juice, Blue Diamond nuts, Bob's Red Mill flours, Ocean Spray, and REI Outfitters are all cooperatives.  I hope that we can all embrace the idea of a business model that puts people before profits.  I hope after reading more about what makes a cooperative tick and what it means to the community to have a healthy, thriving co-op, that you might seek them out in your area and give their products and services a try.  They are the future of our economy, after all!


Tuesday, February 12, 2013

Dinner & dessert for your Valentine

Want to wow your Valentine with a romantic dinner at home?  That is what I set out to do last weekend, since on the actual Valentine's day (Thursday) I've got to work all day, then head straight to a 3-hour class, which leaves me home around 9:30 or 10.  Not exactly a recipe for a romantic evening, right?  So we celebrated a little early at our house and enjoyed a really delicious meal together in the quiet of our own home and without the hefty tab at the end of the meal that we would have to pay to have something similar prepared for us at a restaurant.

This particular meal is not difficult to make, nor does it take long to prepare, but the meal will be so delicious, it will seem that you must have spent hours on it.  Also, for my gluten-intolerant and Celiac friends- this meal is gluten-free.  It also means no post-meal bloat for the rest of us, 'cause nobody wants to feel bloated on Valentine's Day.  So with Florence & The Machine wailing over the speakers and a glass of wine in hand, I set out to prepare a special meal for my Valentine.  The menu includes:

Rosemary Lamb Chops in a Shallot Balsamic Reduction
Almond Green Beans
Volcano Rice
Mini Molten Lava Cakes


For the Chops:

4 lamb loin chops
1 tsp rosemary
1 tsp salt
fresh-ground black pepper
2 Tbsp sunflower oil (or any high-heat cooking oil)
1/2 C minced shallots
1 clove minced garlic
1/3 C aged balsamic vinegar
3/4 C water or broth
1 Tbsp butter

The chops I'm using today come from a small, family-run farm in Lincoln, VT called Meetinghouse Farm.  Ruth Shepherd at Meetinghouse Farm has been raising and finishing organic lambs on pasture since 1986 and in her free time she teaches other farmers how to do so through Master Shepherd Courses sponsored by the Vermont Sheep and Goat Association.

Combine the rosemary, salt, and several generous cranks of fresh-ground black pepper.  Rub this spice mixture into each of the chops and set them aside.  Mince the shallots and garlic.  Heat the oil in a large cast-iron skillet over high heat.  Once oil is hot, place the chops in the hot skillet and reduce heat to medium-high.  Cook for 4 minutes, flip, and cook 4 more minutes without otherwise disturbing them.  This will leave 3/4 inch chop medium-rare.  If you wish to have it more well done, add a minute or two to each side.  Remove the chops from the pan, set aside, and cover to keep warm.

In the skillet with the pan juices, add the shallots and cook a few minutes over medium-high heat until they just begin to turn brown.  Add the garlic and cook an additional minute, then add the balsamic vinegar.   Scrape the browned bits of lamb from the bottom of the pan and then add the broth or water.  Continue to cook, stirring occasionally,  until the liquid reduces by at least half and becomes the desired consistency for your sauce.  Remove from heat and add the butter.  Place two of the chops on each plate and pour the sauce over top.

For the Almond Green Beans:

2 servings of green beans
2 cups water
1 Tbsp butter
2 Tbsp sliced almonds, toasted
salt & pepper

I used a package of our home-grown rattlesnake pole beans from the freezer, defrosted them, and brought 2 cups of water to a light boil in a medium saucepan.  Add the green beans, and some salt & pepper and simmer 2 or 3 minutes over medium heat.  If using fresh green beans, cook a bit longer until desired tenderness is reached.  Drain the water, add the butter, almonds, and another pinch of salt & pepper.  Toss, gently and serve.

For the Volcano Rice:

2 C rice
4 C water
2 tsp olive oil
salt & pepper

I chose Volcano rice because I love the flavor and love how packed it is with minerals and antioxidants.  It is very rich in magnesium, manganese, and zinc due to the volcanic soils where it is raised by a cooperative of family farmers in Indonesia using the SRI method.  This method of rice production uses less water, less seed, less land, and no chemicals.  Plus, the name of the rice made it seem fitting for a hot Valentine's day meal.  Rinse the rice and cook in a 2:1 ratio with water on the stove or per the directions of your rice cooker.  Fluff when done and add a bit of salt & pepper to taste.


For the Mini Molten Lava Cakes:
 
3/4 C sugar
plus a little for coating ramekins
1 Tbsp cornstarch
2 eggs
2 egg yolks
1/2 C dark chocolate
5 tbsp butter
plus a little extra for coating ramekins

In a double boiler (or a large bowl set over a pot of simmering water) gently melt the chocolate and the butter.  Remove from heat.  Mix the cornstarch and the sugar.  Beat the 2 eggs and the 2 egg yolks.  Pour the eggs and the cornstarch sugar mixture into the warm chocolate.  Gently combine, but don't over mix.  Chill.  While batter is chilling, rub butter into each ramekin to coat the bottom and sides, then coat with sugar.  This recipe will fill 2 large ramekins, or 4 small ones.  Place the ramekins on a rimmed baking sheet and fill the bottom of the pan with 1/2 inch of warm water.  Pour batter into each ramekin until each is 3/4 full.  Bake at 325 F for about an hour.  They should rise up out of the ramekins a bit when done, then they will settle and cave in as they cool.  The centers of the cakes should remain gooey like lava, with the outsides completely done.  Serve with a dollop of fresh whipped cream or a dusting of powdered sugar, if desired.   


So pour the wine, light the candles, put on Marvin Gaye's greatest hits, and prepare for sparks to fly!  Happy Valentine's Day, everyone!


Sunday, February 3, 2013

Super Bowl Red Beans & Rice with Buttermilk Bread

According to sports reporter Darren Rovell, 440 gallons of red beans and rice were prepared at the Superdome in New Olreans, Louisiana for the Super Bowl today.  I decided to make a gallon of my own here in Vermont to eat while we watched the game.  Red beans & rice is a staple dish of Louisiana Creole cuisine and historically was  prepared on Mondays, since Mondays were also the traditional laundry day and, therefore, were good days for slow simmering a pot of beans.  Ham was the customary Sunday meal, which meant that there were ham bones left over on Monday for the pot of beans.  I don't have a ham bone, but I do have some delicious Daily Grind pork sausage from Vermont Salumi seasoned with Lincoln Peak Marquette wine and garlic.   For the beans I chose to use 1 1/2 cups of traditional dried red kidney beans plus 1 1/2 cups of Jacobs Cattle Beans.  The latter are heirloom beans grown in Maine which are similar to kidney beans.  I soaked the beans overnight, then slow cooked them this afternoon while listening to some of my favorite New Orleans blues music and gearing up to watch the big game. 

Red Beans & Rice

3 C Red Beans
1 1b sausage
splash red wine
1 medium onion, chopped
1 medium shallot, chopped
1 medium green bell pepper chopped
1/2 C carrots, chopped
1/2 C celery, chopped
1 jalapeno pepper, minced
4 cloves garlic, minced
4 C water or broth
2 C cooked brown rice
1 bay leaf
1 tsp thyme
Salt & Pepper

Brown whole sausages on all sides over medium-high heat in a hot soup pot or dutch oven.  Remove the sausages and set aside.  In the retained sausage drippings, add the splash of red wine and scrape the brown bits from the bottom of the pot.  Add the onion, shallot, bell pepper, carrot, celery, jalapeno, and garlic.  Cook over medium-high heat, stirring, until softened.  Add seasonings, then the rinsed beans, and 4 cups of water.  Bring to a boil, then cover, reduce heat to the lowest setting, and simmer for an hour.

Meanwhile, cook the rice in a rice cooker or on the stove top and slice the sausage into one-inch bias- cut slices.  After an hour, or when the beans turn soft, add the sausage and rice.  Stir and heat through.  Serve with a slice of crusty bread and enjoy.   You'll be glad you made a big pot, since the leftovers are better than the original.


Even though a crusty French bread would be the customary accompaniment to my red beans & rice, I have a recipe for buttermilk bread that I have been excited to try out.  The recipe comes from The Laurel's Kitchen Bread Book- a Guide to Whole-Grain Bread Baking.  There is a great dairy farm in Orwell, VT called The Animal Farm that makes the most delicious fresh-churned butter and buttermilk from their small herd of grass-fed Jersey cows.  They ship most of their supply of dairy products to two restaurants run by Chef Thomas Keller:  The French Laundry in California and Per Se in New York.  It's highly unlikely on my budget that I will ever visit either of these, so I'm lucky that what little they have left, they sell at my co-op.   I love using their buttermilk in everything from mashed potatoes to biscuits and was excited to try it out in a bread recipe.  Here is what you will need:

Buttermilk Bread

2 tsp active dry yeast
1/2 C warm water 
3/4 C hot water
1/4 C honey
1 1/4 C cold buttermilk
5 1/2 C whole wheat flour
plus more for dusting
2 tsp salt
2-4 Tbsp cold, unsalted butter

Dissolve the yeast in the warm water.  Ideal temperature range is between 110 and 115 F.  Mix the hot water with the honey and stir until the honey is dissolved. Add the cold buttermilk.  Meanwhile, mix the salt and the flour in a large bowl.  Make a reservoir in the center of the flour and pour the buttermilk mixture and the yeast mixture in.  Stir from the inside out until all the flour is incorporated.  Turn it out onto a floured surface and knead for 15 minutes.  Cut the cold butter into bits and knead it into the flour.  Knead an additional 5 minutes.  Form the dough into a ball and place in a large bowl.  Cover, and place in a warm, draft-free place for 1 1/2 hours.  To check readiness, poke the dough in the center 1/2 inch deep with a wet finger.  If the hole doesn't fill back in, it is ready for the next step.  Press the dough flat, form it into a ball again, and return it to the bowl.  Cover again and let it rise another 45 minutes.

Press it flat and divide it into 2 separate balls.  Let it rest for 15 minutes.  Deflate it, and shape it into two loaves.  Place them into loaf pans or just onto a baking sheet and let them rise in a warm place until the dough slowly returns a gentle fingerprint.  Preheat the oven to 325 F, brush the loaves with some melted butter or buttermilk, and bake for 1 hour. 


Wednesday, January 23, 2013

Bread basics

Bread has been a part of human history for at least 30,000 years, dating back to prehistoric Upper Paleolithic Europe.  The earliest versions of bread were unleavened, meaning that they were flat, cracker-type breads made without yeast.  Wheat and barley were two of the first domesticated grains and were grown in the region of biblical lands known as the Fertile Crescent more than 10,000 years ago.  The first evidence of the use of yeast for bread baking and for brewing ale came from Egypt in 4000 BC.  In fact, according to the book Food In History by Reay Tannahill, it seems that the discovery of ale was stimulated by the process of bread baking.  So if you like beer, you have bread to thank.

When I was a kid, my mom baked bread in a bread machine from freshly ground wheat that she ground in her wheat grinder.  The incredible smell that overtook the house when bread was baking is hard to forget, and I still think there are few things better than a warm piece of buttered bread fresh from the oven.  I have been wanting to bake my own bread for a while now, but have been a little intimidated by the process.  I had the false impression that it was a complicated process that needed to be done perfectly in order to be any good.  A co-worker recently told me that she and her kids baked bread together all the time and insisted that if her kids could do it, I could do it.  I wondered how I would know if I was kneading it too much or too little, and she said that her kids often "kneaded it to death" and it still came out just fine.

She shared her favorite french bread recipe with me, which came from a book by James Beard called Beard On Bread. Another friend recently took a bread baking class with French Chef Robert Barral, who is the former executive chef at the famous New England Culinary Institute and now runs the very popular Cafe Provence in Brandon, VT.  She was generous enough to share a recipe they made in class for Oatmeal Wheat bread.  Armed with two fantastic recipes and some encouragement, I decided to tackle my fear of bread baking.  I put on some music got to work.


Chef Barral's Oatmeal Wheat Bread

2 C whole milk
1 C old-fashioned rolled oats (plus more for topping)
1/2 C warm water (105-115 F)
2 Tbsp active dry yeast
1/2 C honey
1/2 stick unsalted butter, melted and cooled
plus a little extra for buttering bowl and loaf pans
3 C stone-ground whole wheat flour
2 C unbleached all-purpose flour
1 Tbsp salt
1 lg egg beaten with 1 Tbsp water

Heat milk in a medium saucepan over low heat until hot, but not boiling.  Remove the pan from heat and stir in oats.  Let stand, uncovered, stirring occasionally until cooled to warm.

Stir together water, yeast, and 1 tsp honey in a small bowl.  Let stand until foamy, about 5 minutes.  This is called proofing the yeast and is a way to make sure that the yeast is still live and active.  If the  mixture doesn't foam, discard and start over.  If the yeast is no longer active, your bread won't rise.  If the yeast mixture foams properly, proceed by mixing it with the melted butter, remaining honey, and the cooled oatmeal.

Stir together whole wheat flour, 1 1/2 cups unbleached all purpose flour, and salt in a large bowl.  I am using some fantastic local flours that I want to tell you about quickly.  The whole wheat flour I am using comes from Gleason Grains in Bridport, VT.  Ben Gleason has been growing organic wheat on his family-run farm in Vermont for 30 years!  Ben delivers the flour in 50 lb bags to our co-op every week, fresh from the mill, and many insist it is the freshest flour available.   The organic all purpose white flour I am using comes from Nitty Gritty Grain in Charlotte, VT, which is another fantastic, local, organic family farm.

After combining the flours and salt, add it to the oat mixture and stir with a wooden spoon until a soft dough forms.  Turn it out onto a well-floured surface and knead with floured hands, adding just enough of the remaining AP flour to keep the dough from sticking.  Continue kneading until dough is smooth, soft, and elastic, about 10 minutes.  Form the dough into a ball, then transfer to a large buttered bowl.  Cover the bowl loosely with plastic wrap and a kitchen towel.  Let rise at room temperature until doubled in size, about 1 and 1/2 hours.

Lightly butter two loaf pans.  Turn dough out onto a lightly floured surface and knead several times to remove the air.  Divide the dough in half and shape each half into a loaf.  Place a loaf in each buttered pan, tucking ends gently to fit.  Cover loaf pans loosely with a kitchen towel and let the dough rise in a draft-free place at warm room temperature until doubled in bulk, about an hour.
Put oven rack in middle position an heat to 375 F.  Lightly brush the tops of each loaf with some of the egg wash and then sprinkle with oats.  Bake until golden, 35-40 minutes.  Remove bread from the pans and transfer to a rack until they cool.


James Beard's French Bread

1 1/2 Tbsp dry yeast
1 Tbsp sugar
2 C warm water (100-115 F)
1 Tbsp salt
5-6 C flour (all-purpose and whole wheat) 
3 Tbsp cornmeal
1 egg white beaten with 1 Tbsp water 

Combine yeast, sugar, and water in a large bowl and proof it for 5 minutes until it gets foamy.  Mix salt with your flour blend.  I used a combo of 3 1/2 cups Nitty Gritty all purpose white with  2 cups Gleason's whole wheat stone ground bread flour.  Add it to the yeast mixture one cup at a time until the dough is stiff.  Turn it out onto a floured surface and knead it for 10 minutes until the dough is no longer sticky.  Place it in a large buttered bowl, cover with plastic wrap and a kitchen towel, place it in a warm space free of drafts and let it rise until it doubles in bulk (1 1/2- 2 hours).  Punch down the dough then shape it into two loaves.  Place to loaves on a baking sheet sprinkled with corneal and slash each loaf diagonally with a knife.  Brush the loaf tops with the egg wash and place in a cold oven.  Bake at 400 F for 35 minutes. 


I think that the flavor and texture of both of these breads turned out great for my first attempt, and I hear from much more experienced bread bakers that loaf texture will just get better and better with practice.  Also keep in mind that bread freezes beautifully so if you are only baking for two, like I am, just place the extra loaves in freezer-safe packaging and freeze until you need them.  Another thing I love about bread is that even when it gets a little stale, you can use it to make your own croutons or bread crumbs with minimal effort.  Just toast it, cube it (for croutons) or use a food processor to turn it into crumbs, toss it in a bowl with olive oil, salt, and spices, and keep in an airtight jar.  You can serve the croutons on salads or soups and you can use the bread crumbs to make a delicious crust on things like casseroles, meats, or slices of squash or eggplant. 


Monday, January 14, 2013

Ode to a Meyer Lemon


Even though I am beyond thankful to have a freezer full of our own fruits and vegetables to select from this time of year, I still find myself craving fresh fruits and vegetables in the winter months.  That's why I was so thrilled to receive a box of fresh, home-grown Meyer lemons in the mail last week.  This generous gift came from my Aunt Janet, who lives in Arizona where Meyer lemons are in-season right now.  This particular variety of lemon is actually a hybrid of a lemon and a mandarin orange.  They have thinner skin and a sweeter, more floral taste.  My foolish attempt at growing Meyer lemons in VT resulted in lots of incredibly fragrant blossoms, but failed to yield a single fruit, so I'm excited to finally have some.  My imagination has been running wild with ways to use my cache of lemons and a recent article in the LA Times outlining 100 things to do with a Meyer lemon provided some inspiration.
The #1 suggestion on the list was to make Meyer Lemonade.  Coming in at #2 was a recipe for Cornish game hens with Meyer lemons, olives, and fennel, which I then used to inspire a similar dish of my own creation:  Chicken Linguine with Meyer lemons, fennel, capers, and olives.  Keep in mind that even if you don't have Meyer lemons, you can make both of these recipes with any type of lemon.  Here is how to make them:

Meyer Lemonade

6 Meyer Lemons
6 cups boiling water
1-2 cups of sugar or honey
3 cups cold water
2 half-gallon Ball jars

Begin by cutting each of the lemons in half and use a hand-held juicer to squeeze the juice and pulp from each into the two jars.  No juicing tool?  No problem.  Just squeeze as much of the juice as you can from each lemon into the two jars.  After squeezing in the juice and most of the pulp, throw the remaining lemons into the jars.  There should be 6 lemon halves in each jar.  Heat 6 cups of water in a pot on the stove until boiling.  Remove from heat and mix in 1-2 cups of honey or sugar, depending on how sweet you like it, and stir until dissolved.  Pour 3 cups of the hot liquid over the lemons in each jar and let sit for 5 minutes.  Top off each jar with cold water and stir.  Refrigerate until fully chilled and enjoy a tall, refreshing glass full with a fresh wedge of lemon.


Chicken Linguine with Meyer Lemons, Olives, Capers, and Fennel

2-4 pieces of bone-in chicken
(I used 4 chicken thighs)
Linguine pasta
2 Meyer lemons
1 medium fennel bulb
3/4 cups of green olives with Provencal herbs
1 Tbsp capers
4 cloves garlic
2 Tbsp olive oil
1 Tbsp butter
Splash white wine
1/4 cup whole milk or cream
Salt & Pepper to taste
Fresh grated Parmesan or Romano

Heat the oven to 375 F.  Slice the fennel bulb into thin rings and lay it into the bottom of a 9 X 9 baking dish.  Next, slice the olives and garlic into thin slices and sprinkle all but 3 Tbsp of them onto the fennel in the baking dish.  I used green olives that came marinated in Provencal herbs.  If you aren't able to find these, just use any green olives and add some dried Herbes de Provence to the dish.  Herbes de Provence is a blend of French culinary herbs including some combination of basil, savory, fennel, thyme, and lavender.  Next, slice the lemons thin and and layer all but a few of them over the top of the fennel, olives, and garlic in the baking dish.  Sprinkle the capers into the dish, then drizzle the dish with olive oil and sprinkle a bit of salt and pepper.  Toss gently.  Sprinkle each piece of chicken with salt and pepper, then use 2 Tbs of the reserved garlic and olives and push a bit of them under the skin of each piece of chicken.  Lay a lemon slice over each piece of chicken and then lay the chicken on top of the vegetables in your casserole dish.  Drizzle the whole dish with olive oil and bake for 45 min- 1hour, depending on the cut of chicken you use, until a thermometer inserted into the chicken reaches 165 F.  About 10-15 minutes before your chicken is done, pour a generous splash of white wine into the casserole dish.   

When the chicken is done, remove the dish from the oven and set aside.  Boil the linguine according to package directions, strain, and set aside.  In the warm pot that you boiled your pasta in, add the 1 Tbsp of butter and melt it.  Then add the final remaining Tbsp of reserved garlic and olives to the pot and cook over medium heat, stirring, for 2-3 minutes.  Pour in a splash of the white wine and cook an additional minute or two.  Next, use a baster or large spoon to draw about 1/4 cup of the broth from the bottom of your chicken dish and add it to the pot along with the 1/4 cup of milk or cream.  Simmer for 1-2 minutes and add the cooked pasta.  Toss to coat.  Now remove the fennel, olives, capers and garlic from the casserole dish and toss in the pot with the pasta.  You can either serve the chicken pieces whole with the pasta on the side, or remove it from the bone, shred it, and and toss it into the pasta.  If it's too dry, add a bit more milk and broth from the casserole dish.  Top with a squeeze of fresh lemon juice and a fine grating of Parmesan or Romano cheese and prepare to be wowed.  This recipe is a keeper!


Monday, December 31, 2012

Black-eyed Peas, Collards, & Cornbread

Collards, cornbread, and peas with black eyes will make your New Year healthy, wealthy, and wise.  Or at least that's how the saying goes in the south this time of year.  I love celebrating food traditions and that was the traditional meal at my house growing up in Alabama.  Eating black-eyed peas on New Year’s has been considered good luck for at least 1,500 years, beginning as a Jewish custom first appearing in written history around 500 AD where black-eyed peas were consumed in celebration of Rosh Hashanah, the Jewish New Year. Sephardic Jews, who migrated to Georgia in the 1730's, brought the tradition to the south and the tradition spread after the Civil War. The Northern Army destroyed or stole many of the crops of the south land, but considered the black-eyed peas to be suitable only for animal feed and left it alone.  This made the black-eyed pea a humble, but incredibly important source of nourishment for the surviving Confederates.  These days, the dish is consumed to bring luck and prosperity to the New Year with the collards symbolic of money, the peas as coins, and the cornbread said to represent gold.  I mostly just like to eat it because it wouldn't feel like New Year's day without it.

I let the dried black-eyed peas soak all day while I took down the Christmas decorations, reflected on this past year, and thought about my hopes for the new year ahead.  Once all the peas had plumped and I picked out the occasional bad ones that floated to the top, I gave them a final rinse and gathered the rest of my ingredients.  Here is what I will need to make this southern New Year's specialty:


Black-Eyed Peas:


3 cups black-eyed peas, soaked and rinsed
1 lg onion, chopped
2 small shallots, chopped
3 cloves garlic, minced
2 tbsp sunflower oil
1 smoked ham bone
6-8 cups water
1 bay leaf
1/2 tsp red pepper flakes
salt & pepper
2 cups cooked brown or white rice
2 cups cooked ham, chopped (optional)

Heat the oil in a dutch oven or stock pot.  Add the onion, shallots, and garlic and cook over medium heat until the onions turn translucent.  Then add the black-eyed peas, bay leaf, salt, pepper, red pepper flakes, water, and the ham bone to the pot.  I used the leftover ham bone from our Christmas ham.  I chopped the remaining ham off the bone and set it aside to add later, once the peas are cooked.    Let the peas simmer, uncovered, for about an hour or until the peas are soft.  Add the two cups of cooked rice and the chopped ham.  Simmer another minute or so then serve with the cornbread and the collards.


Cast Iron Skillet Cornbread:

1 1/4 cups coarsely ground cornmeal
3/4 cup flour
1/8 cup sugar
1 tsp salt
2 tsp baking powder
1/2 teaspoon baking soda
1/3 cup milk
1 cup buttermilk
2 eggs, lightly beaten
8 tablespoons butter, melted

Heat the oven to 425 F and place a 12 inch cast iron skillet in the oven to get it hot.  Meanwhile, mix the cornmeal, flour, sugar, salt, baking powder, and baking soda in a large bowl.  Next, whisk in the milk, buttermilk, eggs, and all but two tablespoons of the melted butter.  Once the oven is preheated, remove the skillet and reduce the oven temperature to 350 F.  Coat the skillet with the remaining 2 tablespoons of butter, then pour in the cornmeal batter.  Cook at 350 F for 20-25 minutes.  The edges should be golden brown and a toothpick stuck in the center should come out clean.  Let the cornbread sit for 10 minutes or so before serving.

Collard Greens

10-12 collard greens
3 strips bacon
6-8 cups water
salt
pepper
red pepper flakes

Cook the three strips of bacon in the dutch oven or stock pot.  Remove the bacon and set aside for later.  Allow the bacon grease to cool a bit.  Add the water,pepper, red pepper flakes, and a generous portion of salt and bring to a rolling boil.  Cut the stems out of each of the greens and then cut each leaf into two or three pieces.  Add them to the boiling water and boil for 15-20 minutes or until the greens soften.  Ladle out the greens and a good portion of the stock into bowls, then crumble the bacon on top of each portion.  Be sure to have enough of the stock to crumble your cornbread into after you have eaten the greens.  This is called the pot liquor and is the best  part of the whole dish, if you ask me.


This meal is traditionally served just after midnight New Year's Eve or as the main meal on New Year's Day, but we went ahead and had ours for dinner on the Eve and will have the leftovers tomorrow.  This is one of those meals where the leftovers are even better than the original.  I wish everyone a very happy New Year filled with peace, love, joy, and plenty of good food!