Monday, June 10, 2013

Companion Planting and Other Natural Pest Controls


Memorial Day weekend signaled the start to full-blown gardening season in my region.  The tiny seeds I started in cups 8 weeks prior were now hearty seedlings ready to be transplanted, the cold-hardy seeds I started in the garden around the same time are coming up, and the stack of seed packets I set aside for planting once the danger of frost had past were now ready to meet the soil. The next step was to figure out where each one should go. To make those decisions, there are a few things I like to keep in mind. First, I look at the sketches I made in my garden journal indicating where things were planted over the last few seasons. This way, I can be sure that I'm rotating crops and not planting the same crops in the same beds for at least 2 or 3 seasons. Crop rotation results in better harvests by breaking disease cycles and helping the soil maintain a healthy balance of nutrients, organic matter, and microorganisms. Field trials demonstrate that crops planted in the same plot season after season experience a sharp decline in yields and a sharp increase in disease and pest infestation, when compared to crops that are rotated.

seedlings started 8 weeks ago, now ready for transplanting

The second important consideration when deciding where to plant my seeds and seedlings is the practice of companion planting. Certain plants benefit from sharing garden space with other plants either because they attract beneficial insects or repel the not-so-beneficial ones. There are lots of resources online about companion planting, but my favorite source of info on the subject comes from a book called Carrots Love Tomatoes:  Secrets of Companion Planting for Successful Gardening by Louise Riotte. I found this gem of a book in a box of freebies at the end of someone's driveway while out for a run one drizzly morning and it insisted on coming home with me. I dried it out and dove in. 

Here are a few things I learned and applied to this year's garden: The Brassica family of vegetables including broccoli, Brussels sprouts, cabbage, and cauliflower is aided by the Allium family which includes onions, garlic, leeks, and shallots when it comes to keeping away wireworms. Beans and corn are happy together and help prevent beetle infestations. Native Americans knew a lot about companion planting and coined the term "three sisters" referring to corn, beans, and squash and the symbiosis that occurs when they are grown together. Lettuce and spinach enjoy sharing space with radishes, since the radishes keep the leaf miners off the other two. Cucumbers benefit from the company of radishes to deter ground beetles. There are also two flowering plants that I love to add to my garden as a method of companion planting:  marigolds and sweet alyssum. The marigolds help keep hornworms off of the tomatoes and sweet alyssum attracts numerous predatory wasps and other beneficial insects that feed on the insects that would otherwise feed on your plants. Plus, they add a fun pop of color to the garden landscape and the alyssum has a sweet honey aroma that I can't get enough of.

Sweet Alyssum

Marigold

Glass Gem Corn
With crop rotation and companion planting in mind, I made a mental map of where I wanted everything planted, set some speakers up on the porch, cranked up the tunes, and got to work. I prepped most of the beds by adding a few heaping shovels of our compost, churning the soil, and dropping in rows of seeds or seedlings. Some plants, like those in the Brassica family, prefer more alkaline soil, so I skipped the compost on those beds. I direct-seeded rows of Georgia collards and Laxton's Progress #9 shelling peas from High Mowing Organic Seed Company.  I also seeded rows of Rattlesnake pole beans, Sacaton Brown Tepary beans, Glass Gem corn, and Cochiti corn all of which are seeds saved from extinction by a nonprofit organization that works to collect and preserve endangered traditional seeds called Native Seeds Search.  I then transplanted all of my seedlings into beds and finished by mulching around them with straw to serve as both a blanket and weed deterrent.

Sweet Alyssum planted with my Brassicas

tomatoes planted with marigolds


Two final projects in the arena of natural pest control involved making beer traps for slugs and neem oil spray. Slugs are a common pest in my garden, so I made traps by filling a wide-mouth can or dish with beer and burying it at ground level in several of the beds. Slugs love beer, and when they come to drink it, they fall in and drown. The traps have to be refreshed after rain and it's good to periodically dump out the drowned slugs so they don't get smelly. Neem oil spray is a chemical-free way to deter pests and can be made by combining 1 liter of water and 1/2 teaspoon of unscented dish soap, shaking it, then adding a teaspoon of neem oil. Neem oil can be purchased where organic garden supplies are sold or online through Organix South. Only make as much as you will use in one application, as the neem oil breaks down and loses its effectiveness once it is mixed with the other ingredients. Use the spray as a preventative, spraying leaves and soil about once a week. In instances of infestation, make a more concentrated solution and spray it more frequently.

It is important to keep in mind that with crop rotation, companion planting, and other natural pest controls, the goal is not total annihilation, but rather to keep the garden insect population in a healthy balance. Many garden insects are beneficial and using harsh chemicals for pest control kills insects and other organisms regardless of their role in the garden. This adversely affects the balance of the garden
love your pollinators
ecosystem, the health of the garden soil, the health of the pollinators, and health of the environment as a whole. According to a national water quality inventory conducted in 2000, agricultural pollution is the number one source of water quality impairment to rivers and lakes and is the second largest source of impairment to wetlands.  Additionally, it is a major contributor to the contamination of our groundwater. If that doesn't get your attention, then consider the pollinators who especially
need our help now, as their numbers are decreasing dramatically. Without them we lose the ability to grow fruits and vegetables without the tedious and impractical process of hand-pollination. When I consider these issues, it seems worthwhile to use a gentler, more natural approach to dealing with garden pests.

With a sore body and the satisfaction that comes with a hard day of physical work, I sat on the porch swing marveling over the garden with all of its new life and daydreaming about the fruits of my labor.


Garden from the porch


Tuesday, May 21, 2013

Brine Pickling vs. Vinegar Pickling

When most of us think of pickling, we think of the method described in my last post where the vegetables are often blanched, then hot vinegar and spices are poured over the vegetables and allowed to marinate for a period of time.  These pickles are tasty, but the vinegar does kill the natural cultures and rich enzymes present in the vegetables. Fresh pickling or brine pickling is different in that the vegetables are never cooked, the solution is never heated, and they are salt-based rather than vinegar based.  The salt-based pickles create their own preservative qualities through lactic-acid fermentation as the live cultures that live on the vegetables react with the vegetable starches in the presence of the salt water.  Lactic acid bacteria dominate the environment and lower the pH of the solution to a point where no pathogens can survive, similar to the environment in our gut.  When pickling is complete, these vegetables are still raw, but have become a nutritional powerhouse capable of delivering all the additional benefits that come from consuming wild fermented foods. 

If you read my Adventures of a Wannabe Fermento post, then you may already be familiar with the many benefits of wild-fermented foods.  If not, here is a quick recap:  they are rich in digestive enzymes and probiotics; they produce a complex of B vitamins and vitamin K; they preserve the vitamins already present in the vegetables such as Vitamin C; they improve digestive health; they treat a variety of digestive disorders; they help prevent certain types of cancer;  and they strengthen our overall immunity.  The wild ramp season is nearly over in my region, but pickling is a great way to extend the season and really make the most of vegetables when they are in season.  Especially when it is a vegetable like a ramp that nature provides without any planting or cultivating on my part.  I harvested one last batch so that I could try wild fermenting them in a brine pickling solution.  Rather than use the large fermentation crock I used for my sauerkraut, I will use a handy little invention called the Perfect Pickler that my Aunt Janet sent to me.  It is a quick, inexpensive, and easy way to turn a regular canning jar into a hydroponic, wild fermenting, pickling machine.


To pickle a batch of ramps, I first harvested them, cleaned them well, trimmed the roots and all but an inch of the greens.   Then, I placed them into a clean, quart-sized canning jar and followed the simple instructions in the Perfect Pickler manual:

Brine Pickled Ramps
20-30 ramps
2 Tbsp unrefined, additive-free sea salt
4 cups of bottled spring water or distilled water
Quart canning jar
spices of your choice

First make the brine by combining the salt with the water.  It is really important to use unrefined, additive-free salt since table salt contains additives like iodine and anti-caking agents that will effect the pickling culture.  It is also really important to use bottled spring water or distilled water since chlorine, trace antibiotics, and antibacterial soap residues are present in tap water.  Well water is fine as long as it is not too hard or too soft, but keep in mind that the minerals present in well water may also effect the culture.  I used the Real Salt sample that came with my Perfect Pickler since it is unrefined, non-iodized, and contains over 70 different minerals.  I also chose to add about a teaspoon of whole black peppercorns, a teaspoon of whole coriander, 1/4 teaspoon of crushed red pepper flakes, and a bay leaf for some added flavor.
Once the brine is mixed and ready, pour it over the ramps in the canning jar and fill until the brine is 1/2 inch below the jar rim.  Next, float the brine overflow cup that comes with your kit by pressing it into the top of the solution until the rim of the cup is level with the rim of your jar.  Some of the brine will overflow as you do this, which is fine since you want the brine level at 1/8th-inch below the jar lip once the cup is in place.  If the brine gets into your cup, dump it out and try again.  Next, install the gasket into the jar lid.   Wipe the jar lip clean and twist the lid into place.  Tighten just until snug.  Finally, add tap water to the fermentation lock until it reaches the designated line and twist the fermentation lock into the top of the lid until it is snug and upright.  Do not push it in too deeply.  The Perfect Pickler website has a great video that shows each of these steps in detail.  


The final step is to jot down the date and place the jar in a spot that is away from warm appliances or direct sunlight.  The ideal temperature range is between 68-74 F (20-23 C).  The liquid in the jar may cloud a little, and bubbles will form and rise as the wild fermentation takes place.  If the water in your fermentation lock is bubbling, remove the pickler lid and pour out any brine that may have found its way into the brine overflow cup.  After four days, check to see if the recipe is sour enough for your taste.  If not, add a day or two and re-check.  When the pickles are perfect, replace the pickler top and fermentation lock with a regular jar lid and store in the refrigerator.  The pickles will continue to ferment in your fridge, but at a slower rate.  They will stay fresh for months.  Keep in mind that you can ferment just about any vegetable or combination of vegetables in your pickler.  The Perfect Pickler website has lots of great recipes for everything from traditional brine dill pickles, to krauts, chutneys, and slaws. 

Tuesday, May 7, 2013

Wildcrafting Ramps & Fiddleheads


I recently had the opportunity to attend a talk by Philip Ackerman-Leist where he discussed his book Rebuilding the Foodshed: How to Create Local, Sustainable, and Secure Food Systems.   During his lecture, Ackerman-Leist spoke about the critical components and challenges of creating strong local food systems.  One of the interesting things he mentioned in his lecture was the importance of utilizing the food that is already at our feet.  This practice is known as wildcrafting and is defined as the practice of harvesting plants from their natural, wild habitat either for medicinal use or for food.  A few years ago, my friend Ali led me on a few walks to show me the ins and outs of wildcrafting in my region.  Ali is a physical therapist and also a certified herbalist who utilizes wildcrafted plants to make medicinal salves and tinctures and also harvests them for food.  She taught me where to look for certain common plants and how to harvest them sustainably.  Today, I will focus on two of my favorite plants that Ali taught me to find for food:   ramps (also known as wild leeks) and fiddleheads.  Restaurants and specialty grocers where I live will pay upwards of $10 a pound for these spring vegetables, as they are seen as something of a delicacy.  I don't intend to sell any that I collect, and be aware that it may be illegal to sell them in some places.  But, I will share how to find them, how to sustainably harvest them, and how to prepare them.


Fiddleheads are the young, furled fronds of the ostrich fern, matteuccia struthiopteris,  as they first emerge from the ground.  Once they unfurl they become beautiful full-length fern fronds and are no longer edible, so they must be harvested and eaten when they are still curled up like little pinwheels.  Fiddleheads can be found in damp woodland areas of Central and Eastern North America in early spring before the leaves fill out on the trees that tower overhead.  Search near streams, brooks, rivers, or vernal ponds.  Because the trees in forested areas are still bare in early spring, there is still plenty of light reaching the forest floor allowing the tiny ferns to sprout.   Ostrich ferns can be identified by the clusters of 3-12 shoots on each plant, the smooth stems, and the u-shaped curve on the inside of the stem.  They are high in antioxidants, omega-3, omega-6, iron and fiber.  When locating and harvesting, tread lightly so as to disrupt as little of the natural vegetation as possible.  Harvest only one or two fiddleheads from each fern so that the remaining fronds can reach maturity and reproduce.   Harvest from a wide area, moving often, rather than in a very concentrated zone.  That way, you can be sure that there will be fiddleheads to harvest for years to come.  


Snip each fiddlehead with shears an inch or so from the ground then soak them in water until the little brown, papery shavings come loose from the ferns.  Rinse them well to remove any other dirt or debris.  Do not consume fiddleheads raw.  They should be boiled or steamed for 10-15 minutes and can be prepared several different ways.  My favorite dish I have made with them is a fiddlehead orzo salad.  First, I boiled the fiddleheads in salted water for 10 minutes, then I plunged them into ice water to stop the cooking.  I boiled orzo pasta in a separate pot of salted water, drained, and rinsed it.  Then, toss the fiddleheads, pasta, some halved grape tomatoes, chopped fresh chives, a generous squeeze of lemon, olive oil, salt & pepper.  Chill and serve for a delicious, healthy spring salad.


Ramps, allium tricoccum, are wild leeks that can be found in the same wet, densely wooded areas where fiddleheads are found through central and eastern US and Canada.  They grow in dense clusters in marshy areas and around rivers, streams, and brooks.  They thrive in early spring when the leaves of the forest canopy are thin, allowing light to pass through to the forest floor.  They can be identified by their broad, smooth, green leaves and purple lower stems.  Their taste can be described as a mix between a green onion and garlic.  When harvesting ramps, follow similar rules as you would follow with fiddleheads:  tread lightly, never harvest any more than 5% of any one clump and harvest from the center of each clump rather than from the outskirts.  The ramps can repopulate an area in the center of a clump easier than they can from the outer edges.  When harvesting, you will need a small, sharp spade so that you can dig underneath and harvest the ramp roots and all.  They are well-rooted, so attempting to pull them out of the ground results in tearing the leaves off,  leaving the onion in the ground.  Be mindful of other plants growing among the ramps and don't unnecessarily disturb any of them.  A great example of this sort of thing happened on Sunday when I was harvesting ramps from one of my favorite spots.  Growing among the ramps was flowering trillium, a plant that is listed as threatened or endangered in many places.  Picking or otherwise disturbing them is illegal without a special permit in some states. 

Trillium in the Ramps


Once I harvest the ramps,  I like to place them in a bucket and soak them in water to remove the loose dirt.  Then, I place them on a screen or in a plant tray and hose them down well.  Next, I remove the roots and the outer skins of each ramp and rinse them again in clean, cold water.  Now they are ready to be bagged and stored in the fridge for any meal where you might otherwise use onions, scallions, or leeks.  Because I like ramps so much and they are only available for a few weeks each year, I like to preserve some of them by pickling them.  I use a pickled ramp recipe that comes from a cookbook called Cooking With Shelburne Farms:  Food and Stories From Vermont.  


Shelburne Farms Pickled Ramps

20 small ramps, roots removed and trimmed to 1" of greens
1 cup cider vinegar
1/4 cup honey
1/4 cup sugar (I usually omit this)
1 tsp crushed red pepper
1 tsp whole black peppercorns
1 tsp whole fennel seeds
1 tsp whole coriander seeds
1 bay leaf

Prepare a large bowl of ice water.  Bring a medium pot of salted water to a boil over high heat, add the ramps, and boil for 2 minutes.  Drain immediately and plunge the ramps into ice water to stop cooking.  In a medium pot, bring the cider vinegar, honey, sugar, red pepper, peppercorns, fennel, coriander, and the bay leaf to a simmer, then remove from heat.  Put the drained ramps into a clean pint jar.  Pour the hot pickling liquid into the jar and allow to cool uncovered.  Then, cover tightly and refrigerate for at least 12 hours.  These pickled ramps will stay good in the refrigerator for at least a month.  The cookbook recommends serving these in salads with beets and goat cheese, with charcuterie, or as an unexpected touch to a cheese plate.  I like to eat them straight from the jar.


Another way I really like to use ramps is in a pesto.  Pesto is really versatile and can be spread onto toast, used as a base for a homemade pizza, or tossed with pasta for a quick dinner.  I found this particular recipe in the produce section of my co-op and I'm unsure of its original origin.  I used a really great olive oil sent by my friend Sara that was grown and pressed by her neighbors in Winters, CA and I made a few minor substitutions to the ramp recipe.

Ramp Pesto

1/2 cup ramps, roots removed, leaves and bulbs roughly chopped
1/2 cup basil (or any fresh herbs you have on hand.  I used cilantro)
3 Tbsp olive oil
1 tsp lemon zest
1/4 cup toasted pine nuts (I used toasted pecans)
1/4 cup parmesan reggiano, grated
salt & pepper

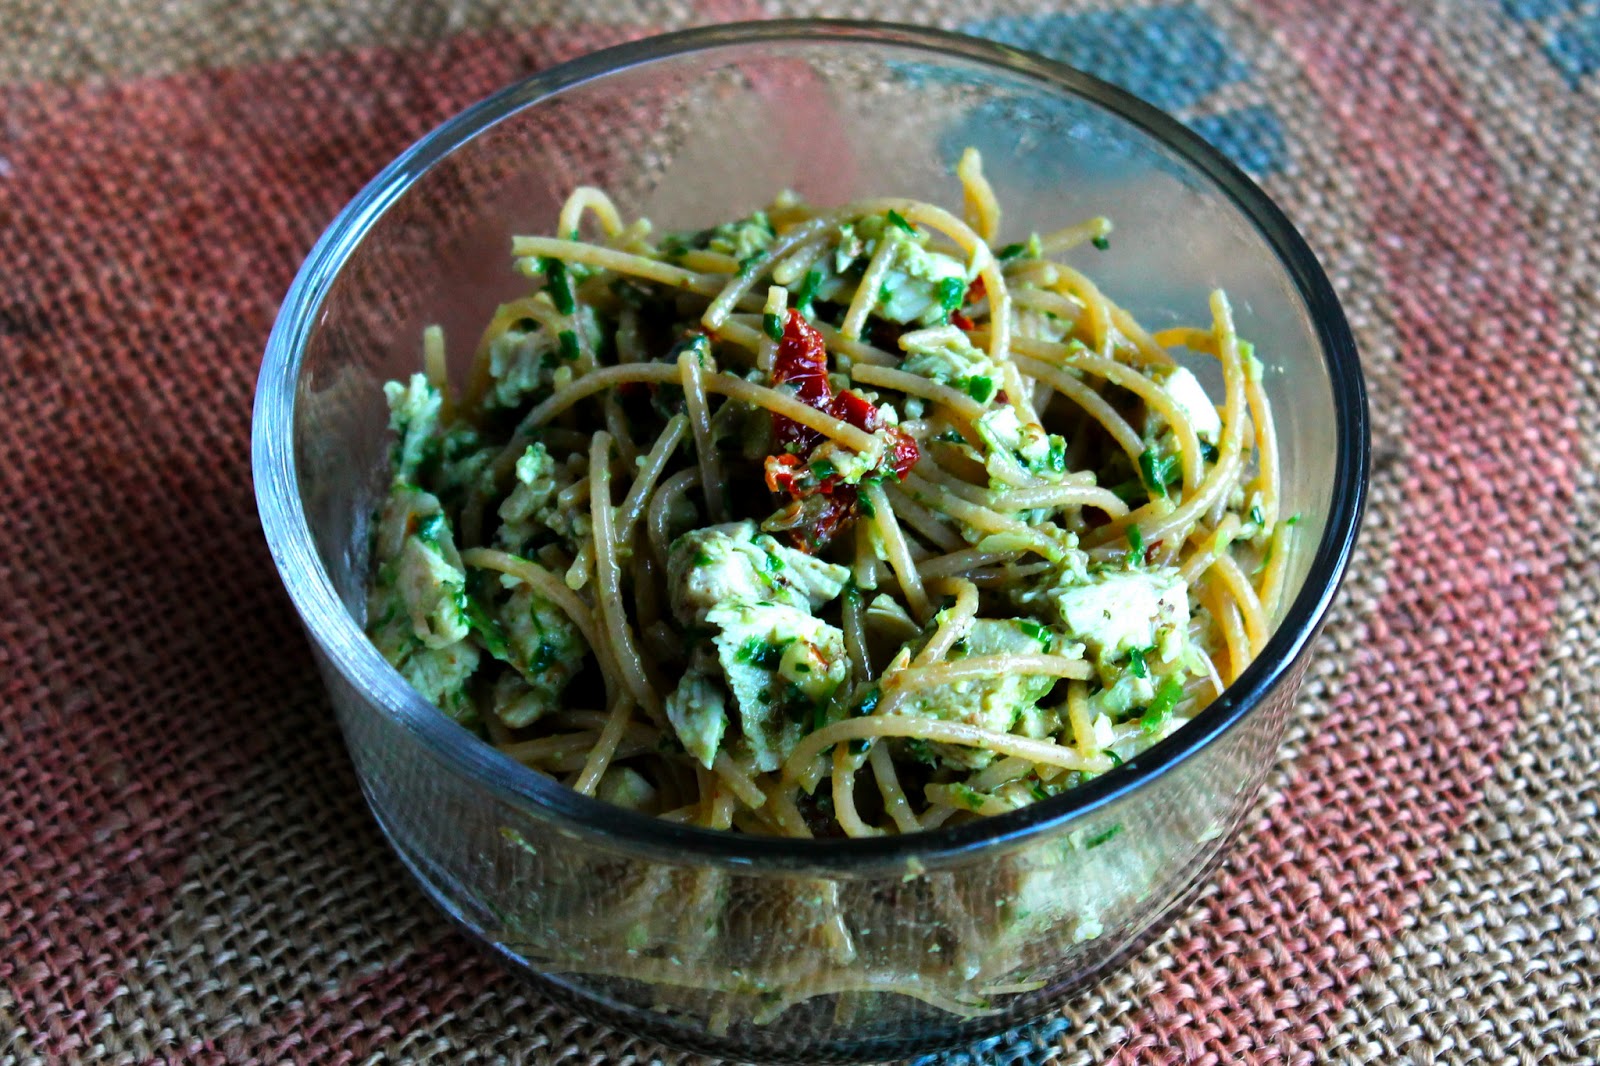
Combine all in a food processor and blend.  I used this most recent batch in a pasta dish by coating a chicken breast in some of the pesto and then baking it.  Meanwhile, I boiled whole wheat angel hair spaghettini, drained it, then tossed it with the shredded cooked chicken, the rest of the pesto, and a few finely chopped sundried tomatoes.  


Wednesday, April 24, 2013

Starting Seeds


"Food is the first wealth.  Grow it right and you feel insanely rich, no matter what you own."
                                                                       -Kristin Kimball in The Dirty Life
       

Garlic
Spring has finally sprung in my corner of the world.  The snow has melted away, the crocuses are blooming, and the peeper frogs are peeping their hearts out.  The garlic that I planted last fall has begun to send green shoots out of the straw that blanketed them through the winter and the rest of the garden beds lie waiting for new life.  Three weeks ago, I combed through the seed catalog from High Mowing Seed Company in Wolcott, Vermont and tried to restrain myself.  With over 650 varieties of organic seeds, I was tempted to order way more seed than my little garden plot could sustain.  To keep from getting carried away I chose fruits and vegetables that I knew we liked to eat;  chose varieties that would grow well in our unique growing conditions; and chose some that we could eat at harvest time and others that we could freeze, can, or otherwise preserve for later.  A few days later, when the seeds arrived, I divided them into three stacks:  seeds that were cold-hardy with instructions to plant directly in the ground as soon as the soil can be worked, seeds that do best when started in seed cups and transplanted after all danger of frost has past, and a pile for the seeds that are best planted directly in the ground after all danger of frost has passed.


I began with the stack of seeds that like to be started in seed cups.  This included four varieties of tomato, Clemson Spineless okra, Early jalapenos, Honey Nut butternut squash, Primax cabbage, Belstar broccoli, Pickling cucumbers, Tomatillos, King Of The North bell peppers, Caribe cilantro, Genovese basil, and Italian Flat Leaf parsley.  Most of them suggest somewhere between 4-8 weeks of growth time before transplanting.  In this region, the magic date when the frost danger has passed comes on Memorial Day weekend.  That gives me about 8 weeks from my planting date to get them sprouted and strong with the help of some indoor grow lights and some outdoor miniature greenhouses.  I picked up a bag of potting mix from Vermont Compost Company and pulled my planting cups and trays out of storage.  I save the planting cups and trays any time I purchase seedlings since they can be stacked together and stored easily.  If you don't have any on hand, you can use egg cartons, empty yogurt containers, or any other reusable containers.  Just remember to poke a few holes in the bottom for drainage.  You can even find instructional videos on you tube that show how to make them from newspaper.  I like to pour all of the potting mix into a bucket, pre-moisten it, then fill each seed cup with the mix, compacting it lightly.


The seed packet will give instructions on how deep to plant the seed and I generally like to plant two seeds in each cup.  If both sprout, I pinch off the one that looks the weakest.  Once all the seeds are planted and labeled, I placed them under an indoor grow light.  These indoor growing set ups can often be expensive, but I found this one in a Gardner's Supply outlet and someone had returned it without packaging or instructions, so I was able to get it at a very reasonable price.  It has a metal frame and a tray below the frame that holds the seeds.  The full-spectrum fluorescent light fixture hangs from the frame on adjustable cables that allow the light to be raised and lowered as the plants grow.  These bulbs don't produce too much heat and use very little electricity.  The ideal temperature for seed germination is between 65-75 F and they like to have at least 10 hours a day of direct light.  It is also very important to keep your seeds moist, but not to over-water.  I like to use a spray bottle so that I won't over-water and the gentile mist doesn't disturb the fragile seedlings.  Before I had an indoor grow light to get my seedlings through the first few cold weeks, I kept the seeds in a sunny window.  I found this method satisfactory except that the plants did tend to become leggy and if I didn't rotate the trays frequently, the ones that weren't directly against the window would lean and bend toward the light.  If you are lucky enough to live in a region where there isn't snow on the ground in April, you can skip this step all together.

seedlings under the grow light

mini greenhouse holding last year's seedlings
Once outdoor temperatures warm up into the 40's and 50's,  I take the seedlings outside and place them in my miniature green houses.  These handy little hot houses were a given to me as a going-away gift from my former co-workers and on a recent 45 degree day, the thermometer inside the greenhouse read 80 degrees.  Each one has three tiered shelves and each shelf can hold two full trays of seeds.  The frame is covered with a clear plastic cover that can zip fully closed for maximum heat, or can be left open and tied back to allow ventilation on warmer days.  Before I had these, I made a cold frame out of old windows.  I posted a want ad to my local group on freecycle.org for four windows and someone who lived nearby responded that they had four to give away, so I picked them up, screwed them together into a cube shape, and made a floating shelf that hung from wire from the top edges so that I could put two trays of seeds inside.  There are lots of DIY instructional videos available on the web that give lots of ideas for making your own cold frame and if you utilize resources like freecycle, you can make one at little or no expense.  Whether using a cold frame or a greenhouse, make sure to install a good thermometer so that you can keep an eye on the temperatures. I have cooked entire trays of seeds by failing to monitor temperatures and failing to vent the greenhouse or cold frame when the mid-day heat was at it's peak.

this season's seedlings in the mini greenhouse


Once that stack of seeds was planted, I moved on to the stack of seeds that are cold-hardy with instructions to plant as soon as the soil can be worked.  These included six different varieties of lettuce, Bloomsdale Long Standing spinach, Cherrybelle radishes, Megaton leeks, and Conservator shallots.  I began by preparing the soil in each garden bed.  A tiller is on my wish list, but since I don't have one yet, I tilled the soil by hand with a shovel.  Next, I added a 5-gallon bucket of our compost to each bed and turned it into the soil.  I then raked the soil level, staked and labeled my rows, and planted the seeds according the recommended depth and spacing indicated on each packet.  Finally, I mulched each row with straw that came from the chicken's winter bedding.  They got fresh straw bedding for spring, and their old bedding makes a great blanket and weed deterrent for my new seedlings.

newly planted rows with straw mulch

The third stack of seeds will have to wait until Memorial Day.  Meanwhile, most of my seedlings have sprouted and will need adequate light, water, and warmth over the next few weeks.  I always plant a few more than I will actually need because I inevitably lose a few.  If I get lucky and they all survive, then I have a few extra seedlings to share with friends.  It would probably be easier to buy all of my seedlings from someone with a greenhouse and a greener thumb than mine, but it is certainly less expensive to do it this way and I never tire of the miracle that is a seed.  It never ceases to amaze me that I can plant a little tiny seed in a plot of dirt and fast forward a few months to a basket full of fresh vegetables.  To borrow another line from Kristin Kimball, it is as simple as this:  dirt plus water plus sun plus sweat equals food.  There are few things I find more satisfying.


Wednesday, April 10, 2013

Adventures of a Wannabe Fermento

About 10 weeks ago, I embarked on a culinary adventure in fermentation.  It began when I received a ceramic fermenting crock and a book by Sandor Ellix Katz titled The Art of Fermentation from my Aunt Janet.  The book is a masterpiece that is not so much a cookbook as it is an instructional manual, anthropological refresher, microbiological refresher, and cultural manifesto.  Katz explains what fermentation is, how it pertains to us culturally, how it has evolved as a method of food preservation throughout history, outlines the many health benefits of consuming fermented foods and gives instructions on how to ferment everything under the sun.  Now, I know what you're thinking.  At the mere mention of the word fermentation, most people picture that green stuff that grows on your leftovers when you leave them in the fridge too long.  We have a great fear in our culture of aging food outside of refrigeration and most view the concept of leaving food outside of refrigeration to encourage bacterial growth as a dangerous threat to health.  But, as Katz points out, nearly one-third of all food eaten by human beings worldwide is fermented.  Things like pickles, bread, cheese, yogurt, kefir, tempeh, sour cream, salami, vinegar, soy sauce, condiments, chocolate, coffee, beer, and wine are all examples of common fermented foods.  Most of the processes by which we make these products are ancient rituals that humans have been performing since the dawn of history, but because in our times these processes are largely relegated to large scale factory food production, we have become so disconnected from the process that we fear it.


Fermentation in this context is defined as the anaerobic transformation of food by various bacteria, fungi, and the enzymes they produce.  Fermentation is inextricably linked to culture, both in the literal sense of the starters we add to the crock to initiate fermentation, and in the broader sense in terms of our culture as humans.  The word culture comes from a Latin word that means "to cultivate" and our cultivation of the land and its plants, animals, fungi, and bacteria are essential to human culture.   In our bodies, bacteria outnumber cells by more than 10 to1 and the majority of these bacteria are found in our intestines.  They allow us to digest and break down nutrients more efficiently, they regulate the balance between energy use and storage, they produce necessary nutrients for us like B and K vitamins, modulate expression of some of our genes, bind with and remove a variety of toxic compounds in foods, and provide us with much of our immunity since many of our immune cells reside in the linings of the gut.  Consuming fermented foods, particularly those containing live bacterial cultures, helps to keep the bacterial populations in our intestines healthy, which allows us to maximize the benefits to our health.


Foods and beverages fermented by lactic acid bacteria and then consumed without further cooking have profound healing aspects.  Living lactic acid bacteria has always been present in food, but is particularly important now due to the multitude of chemicals present in our lives.  Antibiotics prescribed to fight illness wage a war on our intestinal bacteria because they kill a broad spectrum of bacteria rather than targeting a specific problematic bacterial strain.  This is why a doctor will often recommend taking a probiotic in conjunction with an antibiotic.  Even without taking antibiotics, we are exposed to them and also to chlorine and antibacterial cleaning agents through our water supply.  According to Katz, the problem with killing 99.9 percent of bacteria is that most of them protect us from the few that make us sick.  This exposure leaves our intestinal flora diminished and unbalanced, making us more susceptible to infection and disease.  The key to reestablishing and rebuilding healthy levels of bacteria can come in the form of a probiotic supplement, or in the form of fermented foods containing live active cultures.

Probiotic therapy has been found to have a documented and quantifiable measure of success in treating and preventing diseases of the digestive tract such as IBS, inflammatory bowel syndrome, diarrhea, constipation, and even colon cancer.  They have been shown to reduce incidence and duration of common colds and upper respiratory illnesses, and have been shown to improve outcomes and prevent infections in critically ill intensive care patients.  They improve liver function in cirrhosis patients and they increase CD4 cell counts in patients with HIV.  They reduce blood pressure and anxiety.  They can reduce dental caries in children, treat periodontal disease, treat allergies, urinary tract infections, prevent kidney stones, and prevent various types of cancers.  There is anecdotal evidence to suggest that consuming a diet rich in live cultures along with fatty acids and devoid of artificial ingredients, trans-fats, sugar, gluten, or casein can improve the symptoms of autism.  According to  a review in the journal Clinical Infectious Diseases, probiotics like those present in fermented foods, may prove to be one of our most effective tools against new and emerging pathogens that continue to defy modern medicine in the 21st century.  Still yukked out by the idea of consuming fermented foods?  Not me.  I'm sold.


So next the challenge was to decide what to ferment first.  The possibilities are nearly endless.  There are instructions in the book for fermenting fruits, vegetables, grains, beans, seeds, nuts, meat, cheese, fish, and instructions for making yogurt, kefir, butter, buttermilk, wine, hard cider, or mead.  My head was spinning with the possibilities.  My Grandpa Millard has been making sauerkraut all his life and I have a really clear memory of having some of his sauerkraut on a hot dog when I visited him in Logan, Utah as a kid.  It is one of those memories that is so oddly specific that it seems my brain somehow knew that it would someday have some relevance.  So then it was decided, my first ferment would be sauerkraut.  Sauerkraut is the product of a wild fermentation, meaning that the fermentation is based on organisms that are already present on the food.  If you are fermenting grapes, yeast will initiate the fermentation, and in the case of milk or vegetables, the fermentation will be carried out by lactic acid bacteria.  This is also referred to as a lacto-fermentation.  Wild fermentation does not require the use of a starter culture, which introduces specific isolated organisms or established communities of organisms to the substrate.   By contrast, making yogurt or sourdough bread does require the use of a specific starter culture.  I picked up 2 large heads of cabbage grown by Blackwell Roots of Cabot, VT, some non-iodized Kosher salt, some fennel, and a few juniper berries and began my first fermentation experiment.


I washed the cabbage in non-chlorinated water then finely shredded it, saving some of the larger outer leaves whole. Then I began packing the shredded cabbage into the crock along with about 2 Tbsp non-iodized pickling or Kosher salt, 1 Tbsp fennel, and 1 Tbsp juniper berries mixing, bruising, and crushing it with my hands as I added each layer.  It is important to pack it down as tightly as possible, pushing the air out.  I then placed the large intact leaves of cabbage over the top of the shredded cabbage and added enough non-chlorinated water to the crock to cover it all.  It is important that the water be non-chlorinated and the salt non-iodized since both will slow, change, or inhibit bacterial growth.  Finally, I placed the weights on top to keep it submerged and gave it one final push down to remove any excess air bubbles, sinking the weights below the water line.

I placed the top on the crock and added water to the gutter surrounding the lid to create an air-tight seal.  This water level will need to be monitored and refilled throughout the fermentation process.  If you don't have a fermentation crock, then you can use any large, non-reactive container.  For the seal, place a bag filled with water on top of the cabbage in your container, ensuring that the sides of the bag are making good contact with the rim of the container.   By excluding air, you can encourage the growth of the lactic acid bacteria while discouraging growth of undesirable mold or yeast.  When sealed this way, the ferment gurgles and burps for several weeks.  I particularly enjoyed this phase of the fermentation.  There is something fun about having a gurgling, burping jar of liveliness on your counter top.  It was a bit like having another pet in the house.  The exclusion of air is not necessary, however.  Many fermentos do not aim for an airtight seal and instead just scrape the top layer of the ferment off the top, discard it, and consume the rest.  My Grandpa does it that way. 

The final step is the longest and requires some patience.  The ideal fermentation temperature ranges between 50 and 65 degrees Fahrenheit.  Generally, the warmer it is, the faster your fermentation process will be.  Salt also influences fermentation speed, so the saltier it is, the slower it ferments.  The length of time that you choose to allow your substrate to ferment is largely depended on personal taste.  Some prefer the mild flavor and crunchy texture of a shorter, more mild ferment while others like a more mature, longer-aged version.  Some view it in a strictly utilitarian way based on the optimal number of bacteria present.  The concentration of lactic acid bacteria present typically follows a bell curve building to a peak, then declining at high levels of acidity.    Katz recommends sampling the ferment at various stages of the process and judging it to be ready based on your own personal tastes.  I sampled mine at 4 weeks, then again at 6 weeks, but found the flavor and texture to be perfect between 8 and 9 weeks.  At this point you can either pull it all out of the crock, transfer it to jars, and store it in the fridge or just take out of the crock a jarful at a time, leaving the rest in the crock to continue fermenting. 


Tuesday, March 19, 2013

Feast of St. Patrick & a birthday cake

Celebration was the theme at our house this past weekend.  I celebrated a birthday on Saturday and baked my favorite cake to commemorate- a buttermilk cake with lemon cream cheese frosting and blueberries.   Then on Sunday, because I enjoy celebrating food traditions, I prepared a traditional St. Patrick's Day feast.  Today I will share with you the recipes for both.

St. Patrick is the patron saint of Ireland and the holiday originally known as the Feast of St. Patrick was first celebrated by the Irish in Europe in the 9th century.  In the early 1600s, it became recognized as a holy day of obligation for Roman Catholics in Ireland and in 1903, it became an official public holiday in Ireland.  St. Patrick's Day falls during the Christian season of Lent and Irish families would traditionally attend church in the morning and celebrate in the afternoon. Lenten prohibitions against the consumption of meat and alcohol were waived and people would dance, drink and feast.  The traditional meal was Irish bacon and cabbage, but around the turn of the century, Irish immigrants living in New York City's Lower East Side substituted corned beef as a less expensive and more widely available option.  Thus, the American celebration of St. Patrick's Day typically consists of corned beef, cabbage, potatoes, and, of course, a pint or two of Guiness. 

I chose to make our Feast of St. Patrick in a pressure cooker that my Uncle Tom sent to me.  The pressure cooker is great for making one-pot meals, cooks dried beans in a snap (even without pre-soaking!), and doubles as an excellent rice cooker.  It is similar to a crock pot, except that instead of slow cooking foods, it cooks them quite rapidly to juicy, tender perfection.  I get a lot of use out of mine.  The handbook that came with my pressure cooker included a recipe for corned beef & cabbage, which I used as my framework for this meal.  No pressure cooker?  No problem.  You can make this same meal in a dutch oven or in a crock pot.  You will just need to adjust the cooking times accordingly.

Corned Beef & Cabbage with Potatoes & Carrots:

3 lbs Corned Beef Brisket
12 oz Guiness
1 med onion, halved
1 shallot, halved
3 whole cloves garlic
2 cups of water or beef stock
4 medium red potatoes, halved
1 large head of cabbage, cut into 8 wedges
1 cup carrots, peeled and halved
Whole grain Dijon mustard

Trim any excess fat from the corned beef and if the seasoning packet is separate, open it and rub the brisket with the seasonings.  The brisket I selected comes from Lou's Garrett Valley Naturals and came pre-seasoned in a brine made of water, sea salt, unrefined sugar, beet powder, garlic powder, bay leaves, mustard seed, and allspice.   Place the brisket in the pot, then add the beer, onion, shallot, garlic, and the water or stock.  Then, lock the pressure cooker lid, select the meat setting, and cook for 60 minutes.  Release the pressure, open the cooker, and add the potatoes, carrots, and cabbage.  The carrots I used came from Elmer Farm in East Middlebury, VT and the cabbage is from Blackwell Roots in Cabot, VT.  Re-lock the lid, select the vegetable function, and cook 10 minutes.  Serve with a bit of Dijon mustard for the meat.


And now, for the birthday cake!  I chose this cake because it is my absolute favorite.  The buttermilk cake is super moist and the tart lemon cream cheese frosting tastes so great with some of our blueberries that we grew and froze last summer.  In addition to using our own blueberries, I also used our eggs, cream cheese from Green Mountain Farms, buttermilk from Animal Farm and flour from Nitty Gritty Grain Co.   This cake is really easy to make and can be paired with lots of other fruit toppings depending on what's in season or stocked in your freezer.

Buttermilk Cake:

1 cup sugar
1/2 cup unsalted butter, softened
2 eggs, beaten
2 tsp vanilla extract
3/4 cup buttermilk
1 1/2 cup cake flour
1/2 tsp salt
1 3/4 tsp baking powder

Preheat oven to 350 Fahrenheit.  If using frozen fruit, remove it from the freezer and set aside to defrost.  Grease and flour a 9 inch round cake pan, unless you are using a silicone pan.  In a mixer with a paddle attachment, mix the softened butter and sugar until they are creamy.  Add the eggs, then the vanilla, then the buttermilk.  Stop the mixer and scrape the sides.  In a separate bowl, combine the flour, salt, and baking powder.  If you don't have cake flour, you can use all-purpose flour and substitute 2 Tbsp of it for 2 Tbsp of cornstarch.  Sift the flour mixture once or twice.  Turn the mixer on medium and add the flour mix in several batches until combined.  Pour the batter into your cake pan and bake 30 minutes or until a toothpick inserted in the center comes out clean.  Transfer the cake to a rack and allow it to cool before frosting.

Lemon Cream Cheese Frosting

8 oz cream cheese, softened
1/4 cup unsalted butter, softened
2 Tbsp lemon juice
2 tsp lemon zest
1 tsp vanilla
1 1/2 cups confectioners sugar

Mix all but the sugar in a mixer with the paddle attachment.  Blend well.  Sift the confectioners sugar and then add to the mixer in two batches.  Blend until smooth.  Spread over the cooled cake.

To prepare the blueberries, I defrosted them, then squeezed a little lemon juice on them and sprinkled them with a little bit of sugar.  Stir, then put a spoon full on top of each piece of cake as you serve it. 


Tuesday, March 5, 2013

What is a Co-op, anyway?

If you read my posts regularly, you may have noticed a few mentions of my local co-op.  And, if you're curious like I was when I first heard mention of a co-op, you may be wondering what exactly it means to be a part of one.  The United Nations named 2012 the year of the co-op and the latest issue of Yes! Magazine features a cover story about how cooperatives are driving the new economy.  Publications like the Business Insider and Triple Pundit also feature articles on cooperatives.  So what exactly are they and why are they so important?

Here is what I know of co-ops so far:  They can be small like the Middlebury Natural Foods Co-op where I work and shop.   Or they can be Fortune 500 companies, like Land O Lakes and Sunkist.  They can be credit unions, art galleries, insurance agencies, even sports teams (did you know that the Green Bay Packers are a co-op?!).  All together the 30,000 cooperatives in the United States make up a $500 billion dollar industry, employ more than 2 million people, and have around 130 million members.  More Americans have membership in a co-op than hold shares in the stock market.  Globally, there are a billion co-op members with more than $2 trillion in revenue.  If these enterprises were a nation, their economy would be the ninth largest on earth.   What they all have in common is the fundamental idea that co-ops, just like people, can get more done together than anyone can do alone.

Here are a handful of other things that all co-ops have in common:  they are owned by their members in equal shares; their ownership is democratic, meaning that the members elect a board of directors to shape the priorities and direction of the co-op and the members vote on issues pertinent to achieving those priorities; they build healthy local economies; and they exist to meet the needs of their members.  Yes! magazine cites some fascinating statistics from a study titled Healthy Foods, Healthy Communities which point out that for every $1000 spent at a local food co-op, $1606 in economic activity is generated in their local food economy.  That means that 17% more money stays in the community than if that same $1000 was spent at a conventional grocery store.  There are also more jobs created for every million in sales with food co-ops adding jobs at a rate of 9.3% per million and conventional grocers at 5.8%.  Food co-ops on average source 20% of their products from local vendors compared with 6% for conventional grocers.  This means more money going directly to small, local family farms who are then able to stay afloat in the sea of Big Ag and continue to nourish their communities.

The local farmers who supply food to the MNFC are featured in photos in the produce, cheese & dairy departments.

http://upload.wikimedia.org/wikipedia/commons/7/76/ToadLane2009.jpg
Original building of the Rochedale Society of Equitable Pioneers
The cooperative business model is not new.  The first modern, consumer-owned co-op began in the 1840's when a group of cotton and wool workers in the depressed industrial town of Rochdale, England, decided that they were tired of being cheated by dishonest shopkeepers who would use rigged scales to sell flour mixed with plaster, used tea leaves that were dried and passed off as new, and rancid butter disguised under a thin layer of fresh butter.  They banded together to form the Rochdale Society of Equitable Pioneers and sold quality foods at fair prices with any profits distributed back to the members based on their use of the store.  This is where cooperatives really stand out among their big-business peers:  they are profit-making, but not profit-driven.  They are driven, instead, by a desire to meet the needs of their members and the needs of their communities first and foremost.  And not just in the sense of economic health, but also in the areas of education and civic engagement.


The Middlebury Natural Foods Co-op was founded in the early 1970's by a group of families who wanted access to healthy, natural foods at reasonable prices.  They operated first as a buying club, purchasing items at wholesale price and in bulk scale, then meeting at a different members home each time to split up the order among the group.  The buying club grew, and began having surpluses after dividing the items.  They also needed more space for storage and packaging, so they purchased a small store front in the Middlebury train depot and scheduled volunteers to run the store.  The store continued to grow with pre-ordering and retail store functioning side-by-side, and eventually elected a board of directors in 1976.  Fast forward to 2013, and the store is now in a beautiful new building with 3600 members and 60 employees.  The focus remains on providing healthy, natural foods to members of the community (based on a voted-upon buying criteria); stimulating a vibrant local economy; operating under democratic, cooperative ownership; and operating with environmentally sustainable and energy efficient practices.


Additionally, the MNFC puts strong emphasis on community education by sponsoring classes on budget shopping, food preservation, cooking basics, and other topics in partnership with the Hannaford Career Center.  Last week, we co-hosted a GMO labeling forum with the Northeast Organic Farming Association at the local American Legion. We often give tours to middle and high school groups, senior groups, and  college students who are studying local food systems.  In a few weeks, I will give a tour to a group of young parents who are interested in learning how to shop for healthy foods on a tight budget.  I'm particularly enthusiastic about that upcoming tour because I love debunking the myth that shopping for healthy, whole foods needs to be expensive.  I also like to let community members know that you don't have to be a member of the co-op to shop there, but membership does come with a discount at the store and at other local business in town.  Plus, membership brings monthly member coupons, an informative and educational monthly member newsletter, and the opportunity to vote and have a voice on issues that matter to me as a co-op member.  Board meetings are open to all members and members are encouraged to attend and participate. 


Another thing I find really interesting and appealing about my co-op is their strong emphasis on local products.  Many of the small farmers and food producers still deliver their goods themselves, and it gives members and customers a chance to meet them and ask about their products, processes, challenges, and experiences as a small food producer.  There is something special about meeting the people who grow and make your food, and you begin to feel a distinct connection between their success as a farmer/producer and your role as a consumer.  You begin rooting for them to succeed because you see how hard they work and you like what they bring to your dinner table.

I also love the fact that my co-op donated over 7000 pounds of food to our local food shelf last year, we compost much of the food waste that can't be donated to the food shelf, and many of our farmers and producers reuse the cardboard boxes and other containers they ship and package food in.  Things like maple syrup buckets, honey buckets, nut butter buckets, egg cartons, and glass milk containers are reused over and over again.  Food co-ops in general recycle 81% of their plastics, compared with only 29% at conventional food stores.  Reusing and recycling means a lot less food and materials are going to waste.


Vermont Cheeses

The MNFC represents just one example of a co-op and how it can impact a community.  You may not have a food co-op in your area, but you may have a credit union, an artists cooperative, a farmers cooperative, or an insurance co-op.  You may also have the opportunity to purchase items from cooperatives at conventional stores.  Cabot Cheese, Florida's Natural Orange Juice, Blue Diamond nuts, Bob's Red Mill flours, Ocean Spray, and REI Outfitters are all cooperatives.  I hope that we can all embrace the idea of a business model that puts people before profits.  I hope after reading more about what makes a cooperative tick and what it means to the community to have a healthy, thriving co-op, that you might seek them out in your area and give their products and services a try.  They are the future of our economy, after all!